
External Applications
This document covers the basics of creating and installing external web applications.
What are External Applications?
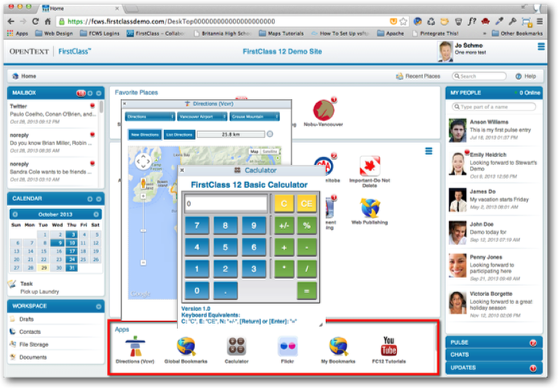
External Applications that run within the FirstClass Apps section of the new FirstClass Web client can be hosted on any web server.
These are just standard web applications but run within an iFrame inside the FirstClass application itself.
External Apps Configuration Form
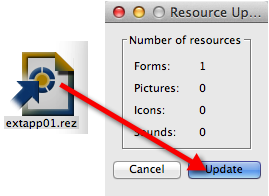
At the time of writing this document, the FirstClass Client 12.007 did not have the latest Configuration form installed. To take advantage of a new feature to allow external applications to be rendered within the center panel of your web site (see below) you will need to download and merge the latest configuration form.
To do this, go to http://www.firstclass.com/Resources/Tips/ExternalApps/resources/extapp01.rez to download the latest form.
Once you have downloaded this file you can:
- Log in to your FirstClass server as Admin using the FirstClass client.
- Upload the extapp01.rez to a location on your FirstClass Server
- Double-click on the file and click on update when the resulting dialog appears
The form is now merged with your logged in settings file and replaces the default form that is part of the FirstClass 12 client.
Installing an External Web Application
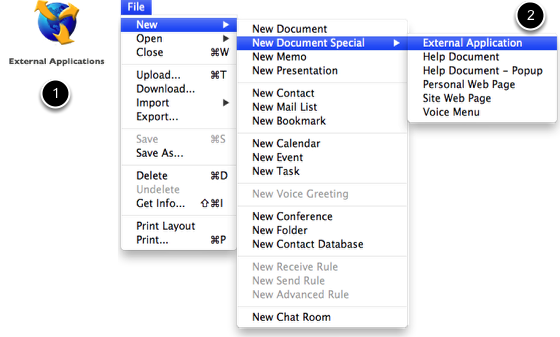
To install a web application you must log in as the administrator using the FirstClass Desktop client and
- Open the External Applications folder which is located on the Admin desktop.
- Choose File > New > New Document Special > External Application
This will create a new External Application form within the External Applications folder.
The External Application Configuration Form
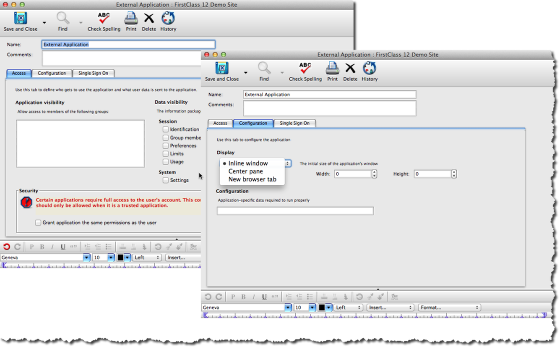
The new form has 3 tabs. Only the first two tabs Access and Configuration currently apply. As more information is made available about the upcoming Single Sign on capabilities of FirstClass, this document will be updated.
The Access Tab
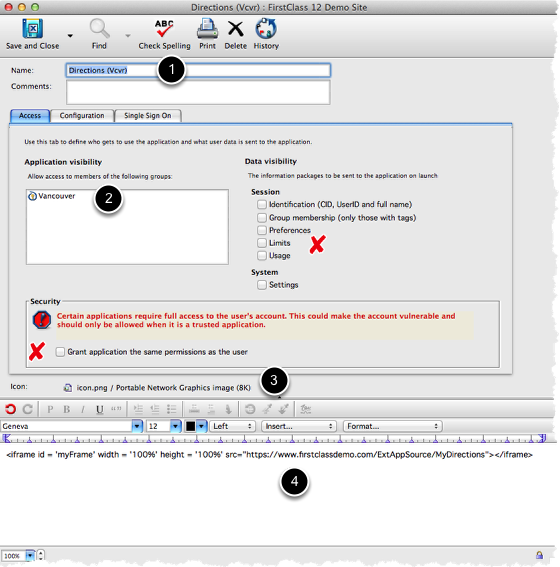
The new form has 3 tabs. Only the first two tabs apply and will be noted and the fields are as noted below:
- The name that the application will use in the Apps section (required)
- The group(s) to which the application will be available and will appear in the Apps section (required)
- The icon used for the application. Must be named icon.png and is typically a 64px X 64px png icon. (required)
- The iFrame code that points to the source of the web application (required)
X - The Session/System settings are not required. All Session information is gathered via a direct API call and is part of the template set.
X - The "Grant application the same permission as the user" field is also not used with this method as access to the client desktop can be made through direct API calls similar to how the session information is gathered.
The Configuration Tab
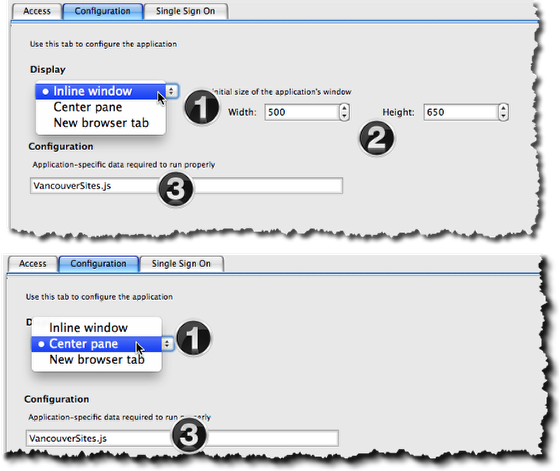
The new form has 3 tabs. Only the first two tabs apply and will be noted and the fields are as noted below:
- Select if you want to have the application displayed as an inline window or replacing the Center pane. Note: The 'New Browser tab' option does not currently apply to external applications.
- The dimensions that the App window will have if you have selected Inline Window.
- A string passed to the application on startup (optional)